Blountsville’s humid summers and mild, wet winters create a breeding ground for mold, mildew, green algae, and wood wear. A clean fence not only boosts curb appeal but also extends its lifespan by protecting against rot and grime. In this guide, you’ll find material‑specific pressure‑washing tips, safety measures, seasonal timing, and post-wash care—so you can tackle your fence like a pro.
Step 1: Know What You’re Working With
Before getting started, it’s important to figure out what kind of material you’re up against. That’ll help determine what kind of washer settings, solutions, and methods to use.
Wood: Older, softer pine and cedar are common around here. These are beautiful but easy to damage if hit too hard.
Vinyl or Composite: White panels are popular for low-maintenance boundaries, but they’re prone to mildew, algae, and pollen sticking.
Metal: Wrought iron or aluminum rails add class—but they rust or lose paint fast if not taken care of.
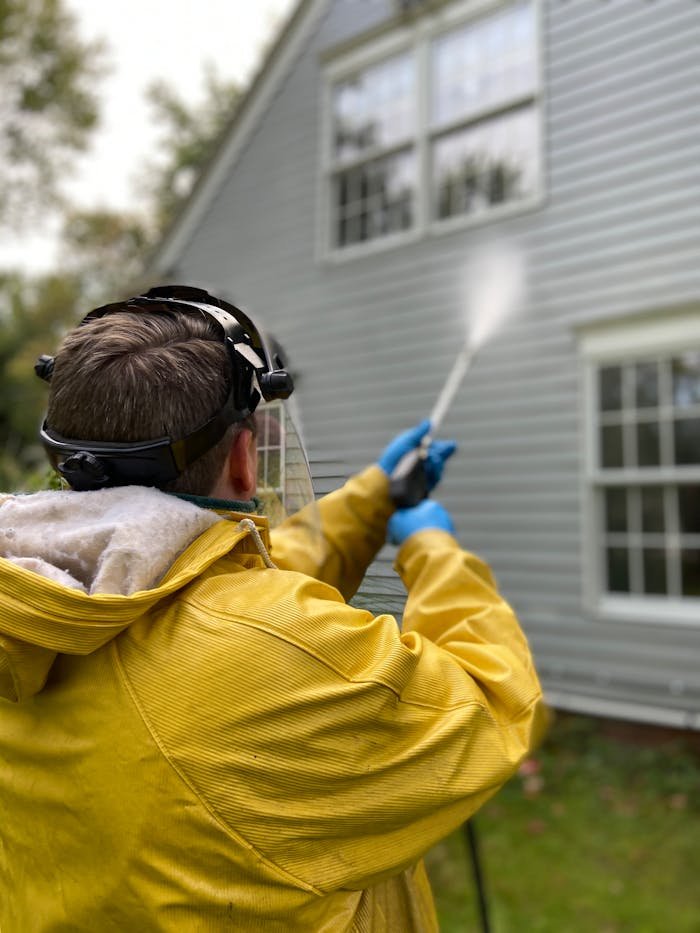
Step 2: Get Set Before You Spray
Don’t just crank up the washer and go at it. There’s prep work that’ll save you from major messes—or costly repairs.
Start with an inspection. Look for busted boards, rusted hinges, popped screws, or cracked slats. Fix what you can first.
Clear the area. Trim back bushes, move flower pots or garden decor, and soak nearby plants with water so they don’t absorb runoff.
Suit up. Wear safety glasses, gloves, closed shoes, and maybe even hearing protection if using gas-powered gear.
Choose your tip wisely. Green or white spray tips (25°–40°) offer a wide angle and lower pressure. Skip the red one—it’s too narrow and dangerous for surfaces like wood.
Step 3: Select the Right Settings & Soap
Different materials need different amounts of water force—and the wrong combo can rip things up.
| Material Type | Pressure Range | Spray Tip | Distance to Hold |
|---|---|---|---|
| Soft Wood | 500–1,000 PSI | 25°–40° | 12–18 inches |
| Vinyl Panels | Up to 1,500 PSI | 40° | Start at 3 feet |
| Metal Rails | Max 2,000 PSI | 25°–40° | 12–18 inches |
For solution options:
For mildew: Use a 1:4 mix of white vinegar and water or a biodegradable cleaner.
For stubborn grime: A light dish soap diluted with water does the trick.
For natural wood: Skip the bleach—it’ll dry it out and bleach the color.
Step 4: Wash the Right Way
Here’s a simple game plan to get the job done without streaks or damage:
Work in sections—5 to 10 feet at a time.
Rinse first with plain water to loosen up stuck-on dirt or pollen.
Spray your solution from the bottom up to avoid drip marks. Let it sit for a few minutes but never let it dry completely.
Use a soft brush on any moss or lichen, especially around shaded areas.
Rinse down from top to bottom, keeping the nozzle at a slight angle. Always follow the direction of the grain or the panel lines.
Double-check your work and touch up any spots you missed.
Step 5: Let It Dry & Protect It
After it’s all been sprayed down and rinsed clean, don’t rush the follow-up:
Dry time: Give it 24–48 hours of sunshine and airflow.
Apply a sealer: Especially on wood, to protect from moisture, mold, and UV rays.
Inspect for moisture spots: Especially around posts or the base where water collects.
For metal types, consider a rust-resistant coating or paint touch-up once it’s bone dry.
Step 6: Avoid These Common Mistakes
If you want to save yourself some frustration—or even some cash—watch out for these common slip-ups:
Using too much force: You can’t undo splintering or gouging once it’s done. Always start with the lowest pressure and go up if needed.
Washing from the top down with soap: It drags dirt across the surface and creates streaks.
Letting soap dry in the sun: It can leave chalky residue or damage soft materials.
Skipping safety gear: Even mild sprays can send debris flying. Better safe than sorry.
Spraying too close: Holding that nozzle just a few inches too near can shred wood or chip vinyl.
Step 7: When’s the Best Time to Tackle the Job?
Northern Alabama’s seasons can be wild—but there are windows of opportunity to get this kind of job done right:
Late spring to early summer: After the rains but before peak heat is ideal.
Fall: When humidity starts to drop, it’s a good time for maintenance and prep before winter.
Avoid doing this right after a heavy storm or during those mid-July scorchers. Drying time and even spray control are much harder in high heat.
Step 8: Tips for Your Specific Material
Wood Panels:
Use a lower pressure and fan tip.
Let dry fully before adding stain or sealant.
Re-stain every 2–4 years for best results.
Vinyl Barriers:
Avoid harsh chemicals that can cause fading.
Spot treat green buildup with vinegar.
Rinse thoroughly and dry to prevent streaks.
Metal Rails:
Use rust-neutralizing solutions for old spots.
Scrape flaky paint before rewashing.
Touch up with spray paint after it dries.
Step 9: Questions Folks Around Here Ask the Most
Q: Can I use bleach to wash wooden boards or slats?
Short answer: It’s not a great idea.
Even when watered down, bleach is a harsh chemical that can dry out the fibers in natural wood. Over time, this weakens the structure and strips away that nice, rustic look—especially with cedar or pine. It can also cause blotchy, uneven color patches that don’t come out even with staining.
If you’re trying to deal with green spots, mildew, or stubborn grime, a better alternative is a vinegar and water mix. White vinegar is naturally acidic and can break down organic buildup without harming the grain or color. For really tough jobs, pick up a wood-specific solution from the local hardware store that’s labeled safe for outdoor planks or posts.
Q: How often should I plan to wash my yard borders?
Once a year is a solid goal for most folks.
But—and it’s a big but—it depends on what kind of space you’re dealing with. If your yard backs up to thick trees or stays shady most of the day, moisture tends to linger, and green stuff builds up faster. Same goes if you’re close to creeks or ponds, where mold and algae are more active.
If that sounds like your setup, you might want to schedule a second go-round each year—maybe once in early spring and again in late fall. A light wash more often is better than a heavy one too late.
Q: Do I need to add a protective layer once it’s all rinsed off?
Yes—especially for natural wood.
After everything is rinsed down and completely dry, adding a sealant is a must if you want to keep your boards from fading, cracking, or absorbing water. Sealers block moisture from soaking in, help prevent warping when the temperature shifts, and protect against the sun’s rays eating away at the surface.
You don’t need to seal vinyl or metal panels unless they’re part of a specialty finish, but for any untreated lumber or stained wood, this step is key. Just make sure it’s totally dry before applying it. Even a little trapped moisture can mess with how it sets.
Q: Should I go with a gas-powered washer or an electric one?
It depends on how big the job is—and what you’re comfortable using.
Electric units are lighter, quieter, and easier to move around. They’re perfect for smaller areas or if you’re just freshening things up. They don’t put out as much force, but they’re plenty strong enough for most residential cleaning. Plus, you just plug it in and go.
Gas units, on the other hand, deliver more power and don’t need to be tethered to an outlet. They’re a better pick if you’ve got a long stretch of material to cover or a serious buildup of dirt and grime. The downside? They’re louder, heavier, and you’ll have to deal with fuel, oil, and a bit more maintenance.
So, if it’s a quick seasonal job, electric will probably suit you just fine. But if this is a full-weekend project or if you’ve let things go for a few seasons, gas might be worth the effort.
Q: Is there anywhere local I can get the equipment without buying it?
Yes!
Most of the hardware rental spots around here—think family-owned supply stores or the bigger chain locations in nearby towns—have day or weekend rental options for both types of equipment. You can usually get the full package too: nozzles, extension wands, cleaning solution, even safety gear if you ask.
They’ll often walk you through how to use the washer safely, what pressure level to use for what material, and how to avoid damaging anything in the process. It’s a great way to save money if this isn’t something you plan on doing often.
Step 10: Wrap-Up & Final Thoughts
Let’s be honest—what surrounds your yard makes a big difference in how the whole place looks. When those long, weather-beaten stretches are covered in algae, pollen, or dirt streaks, it doesn’t just look worn out—it shortens the life of the structure too.
But when you take the time to freshen things up the right way, you’re doing more than improving how it looks. You’re protecting your investment, keeping your place safe, and showing a little pride in your space.
Whether you’re working with cedar, vinyl, or painted rails, the key is knowing what you’re working with—and giving it the care it needs without overdoing it.
